Save Time and Boost ROI with PlaybookBuilder’s Communication Features
Time is precious, and we could all use more of it. PlaybookBuilder helps you save time while maximizing your company’s ROI on processes by ensuring your team actively uses them.
In this article, we’ll introduce you to the Campaigns Feature—a powerful tool that lets you pre-schedule drip emails and text messages linked to your content.
The best part? It’s behavior-driven. Once set up, you can let it run on autopilot. PlaybookBuilder will automatically send targeted messages based on the schedule you choose or how users interact with the platform.
Ready to streamline your communication and make the most of your processes?
Watch a Video or Read the Step-By-Step (it’s below the video)
STEP ONE: Getting there
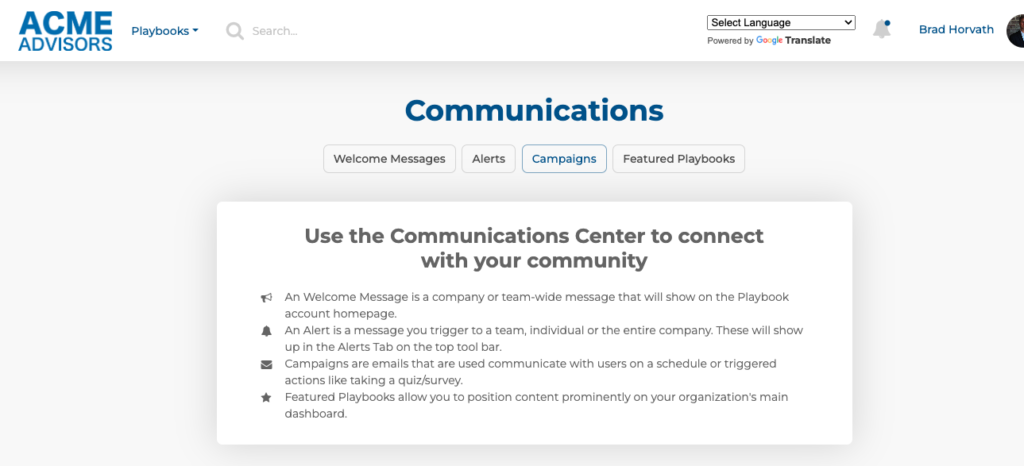
Campaigns is located in the Communications area of your account. It’s highlighted here below.
STEP TWO: Creating Your First Campaign
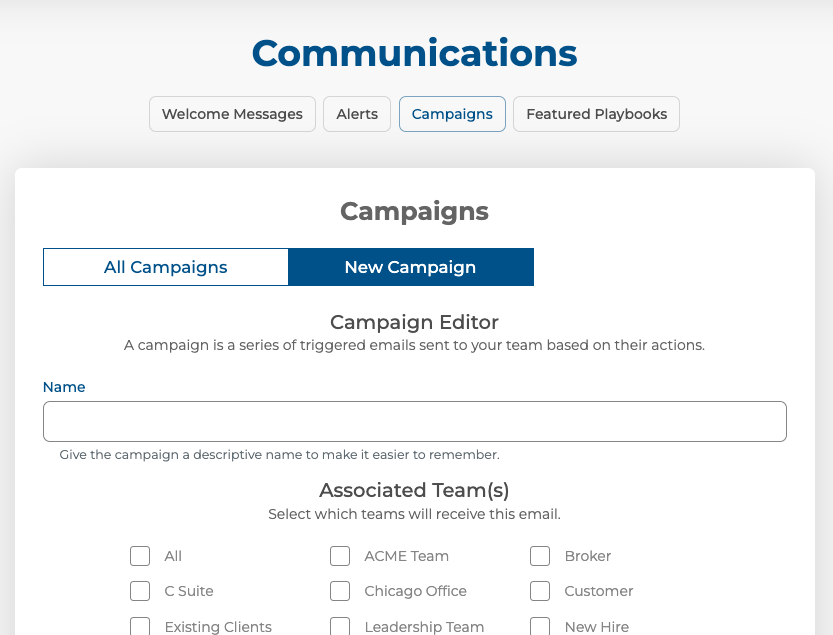
Next, you’ll select New Campaign from the toggle switch along the top. See below.
STEP THREE: Set Up
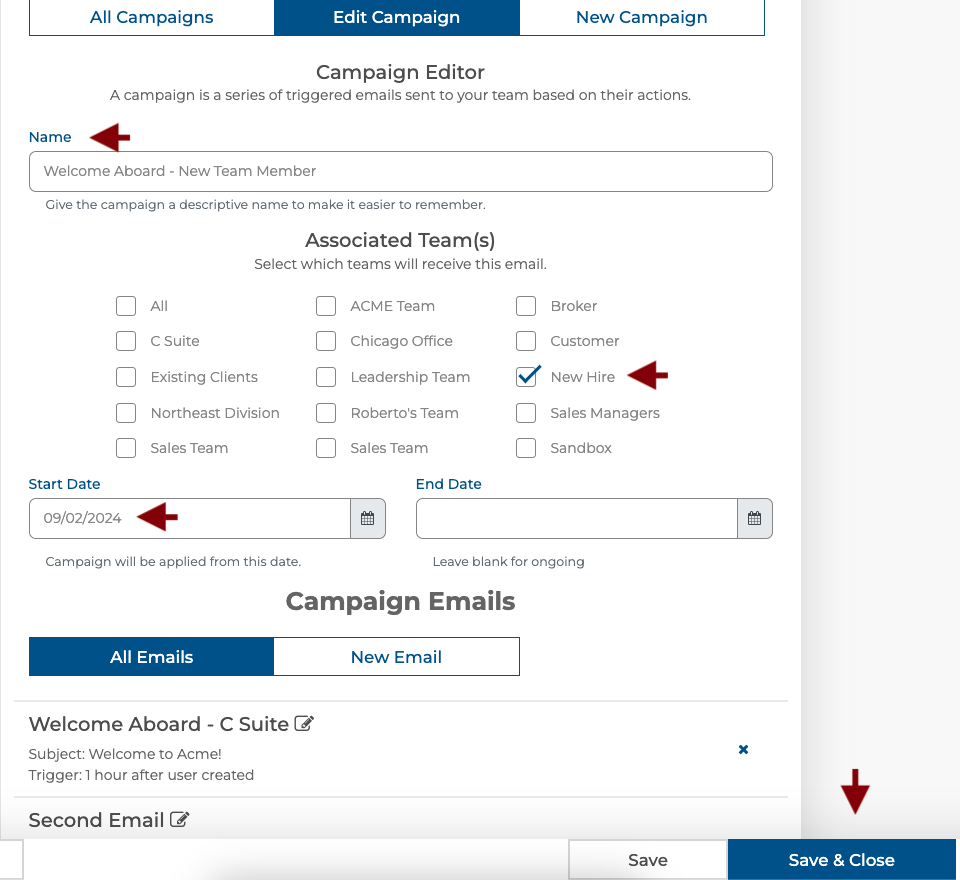
Setting up your Campaign is easy and fast. First, NAME your Campaign. You might select something like:
New Hire Onboarding
Training Schedule
All Team Reminders
Next, you’ll design on the TEAMS that will access the content. If you’re not familiar with Teams and how they function, click HERE to learn more.
And finally, add your Start Date and End Date. You might like your Start Date to begin today or in the future. Also you might like your campaigns to be ongoing. If so, leave that field blank.
Last step: Hit SAVE & CLOSE on the bottom of the screen.
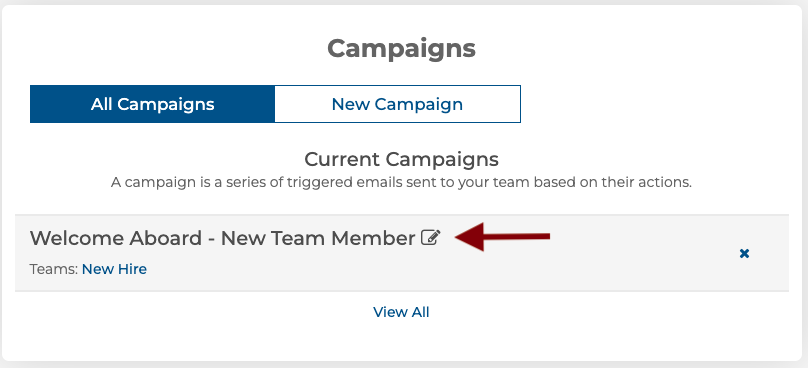
STEP FOUR: Select Your New Campaign to Edit
Simply click the desired campaign and we’ll begin creating content.
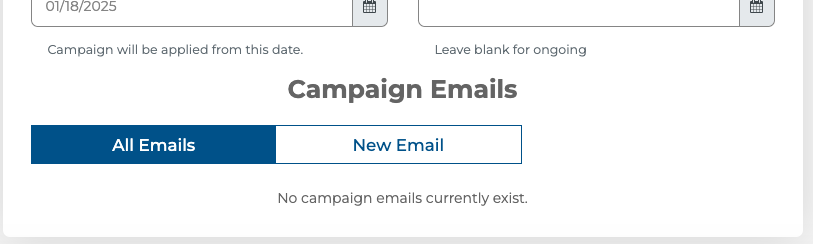
STEP FIVE: Building Campaign Content
First, let’s add a new email. Click NEW EMAIL on the right side toggle switch. It will open an editing space for you to create your first email.
STEP SIX – PART ONE: Creating an Email / Text Message
First, name it. You’ll want to name it something you’ll remember as a reference for yourself. This will NOT be seen by the user. Example: EMAIL #1
Next, you’ll create your Subject Line. Just like in an email, you can put a Subject Line. We recommend something punchy and clear. Even add Emojis!
Now go down to the CONTENT area and craft your email.
Next, consider linking to content? You can select the button for “Include Link to Playbook content”
Once you do, the drop down menu will direct you to the Playbook, Process, Step or specific Asset to link.
Include an SMS Text Message? Select the radio button for “Send Text Message”. You will have 100 characters to add to the message.

Here’s an example:
- You add a user to PlaybookBuilder at 12pm.
- At 1pm PlaybookBuilder sends that user a welcome email with a link to your Onboarding Playbook.
- Two days later, PlaybookBuilder sends them a “Check-In” email
- Two days after that, PlaybookBuilder sends them a quick survey asking about they’re first week
- A week later, a reminder to review the Company Handbook
- Two weeks later, it brings them to your Values Speech
- A month later, a review of the dress code policy
- Two months later, a reminder to review the cyber-security policy and take the test
- A month after that, a survey to ask how they’re training is matching their needs
STEP SIX – PART TWO: Campaign Trigger
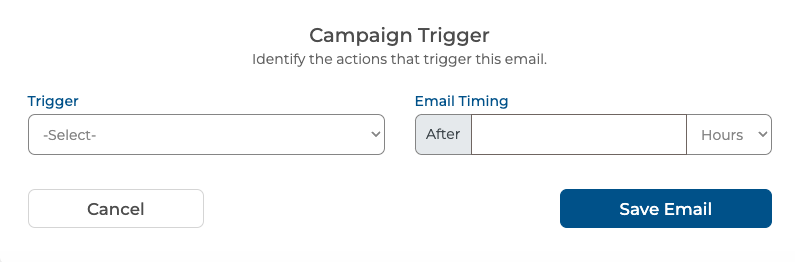
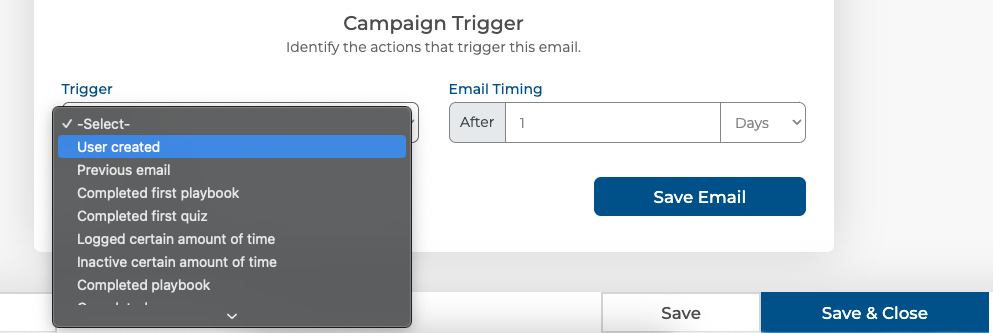
Select your email trigger using the drop down and then the Email Timing on the right. Note: If you’d like to change from Days to Hours on the Email Timing, you can click next to the words “Days” and select “Hours”
Finally, click SAVE EMAIL and begin your next email in the sequence.